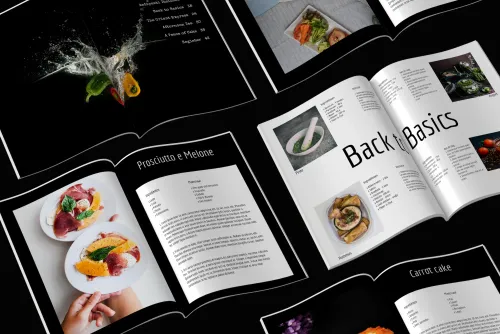
What is a spread? It is the juxtaposition of two pages in a magazine. It can be used for a family photo in a magazine for a birthday or wedding, but also for a group photo of the class in a farewell magazine for the 8th grade or a yearbook.
How to make a nice spread in the makerspace?
The example above shows how beautiful a spread can be in a magazine. Because in Jilster you lay out the pages separately from each other, it is useful to know how to go about making such a spread.
**Which photo to choose for a spread?
- For a spread you need a very good quality photo that remains good enough when you enlarge it considerably. You can tell by the number of stars at 'image quality'.
- In principle, a 'landscape' photo is required. A portrait photo is possible, but then you won't get everything in the picture.
- Make sure that the nose or something else important is not in the middle of the page.
Stitched or glued magazine
If you are planning to order a magazine that has been stapled, it is especially important that the two photo parts fit together properly. When this magazine is opened, you can see the middle very well.
With a glued glossy, it is a little less strict: the centre of a glossy does not fall open that far.
This is how you make a spread:
- First you make the left half of the spread by opening a page with an even number (2, 4, 6, etc.).
- Upload the landscape photo, drag it onto the page, and stretch it (using the blue squares around the photo) until the left side of the photo fills the page.
- Now slide the photo until you only see the left half of the photo on the page. Position the photo so that the white background is no longer visible.
Remember the point on the photo that intersects with the outer right-hand dotted line. - Save the page. Write down the values of the y-axis and the position (width and height) of the photo and close the page.
- Now place the same photo on the right-hand page. Type the same values for y-axis, width and height. Then move the photo to the right and make sure that the point that you see on the left outer dotted line matches the point that you remembered from the other half of the photo (on the even page). Save and close the page.
- Are you the chief editor? Then check if the two halves match by using 'preview' or by flipping through the magazine. Are you an editor? Then look at the browsable example.
Split in InDesign
Another possibility is to split the photo in advance in InDesign. This is how you do it:
- When opening a new document in InDesign, select an A4 format including 4 mm bleed.
- Place the desired photo in InDesign over 2 pages (spread) up to and including the bleed.
- If you are happy with the placement of your photo, you can save the pages as a PDF file. - Save them as individual pages including a 4 mm bleed without any cutmarks and marks.
- Open the desired pages in Jilster and upload the PDF. Place the left half of the photo on the left page and the right half on the right page.
- Save the pages and your spread is ready.
Sets of two pages
In the templates you will find several examples of two-page sets that you can also use for a spread. So they are already ready for use.